Showing posts with label Garden Ideas. Show all posts

Soda Can Wind Spinner

We went to a botanical garden and saw a very nice wind sculpture which captured my daughter’s attention. It was very mesmerizing and thought of making our mini wind spinner. This is a cheap garden decoration project you would love. Note that this project is not kid friendly, though they can enjoy watching the wind spinner once it’s done and already in the yard spinning.
  Soda Can Wind Spinner

Materials needed to to do this:
  • 2 empty soda cans
  • Scissors
  • Wire/Fishing line
  • Plastic Straws or any stopper
  • Old hanger
  • Fliers
  • Safety Hand gloves
  • Paint

How to make Pinwheel made from soda can

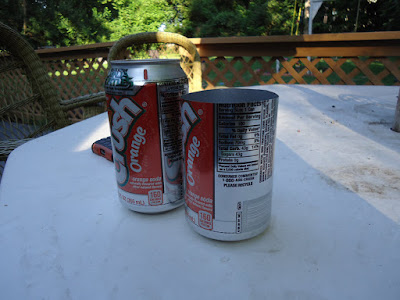
1.    Clean the soda can and let it dry. Using a pair of scissors, cut off the top part of the can, about 1 inch from the rim. Be careful when doing this as the can edge is very sharp that could cut your finger.
soda-can-wind-spinner-step-1

2.    Make 8 equal blades from the side of the soda can. Do this by vertically cutting one side of the can from top to about ½ inch at the bottom. Cut the same at exactly opposite side of the soda can.

soda-can-wind-spinner-step-2

3.    Now that you have 2 equal sides, vertically cut one side of the soda can and then cut the other side to make 4 equal sides. Repeat until you have 8 blades.

soda-can-wind-spinner-step-3a
soda-can-wind-spinner-step-3b

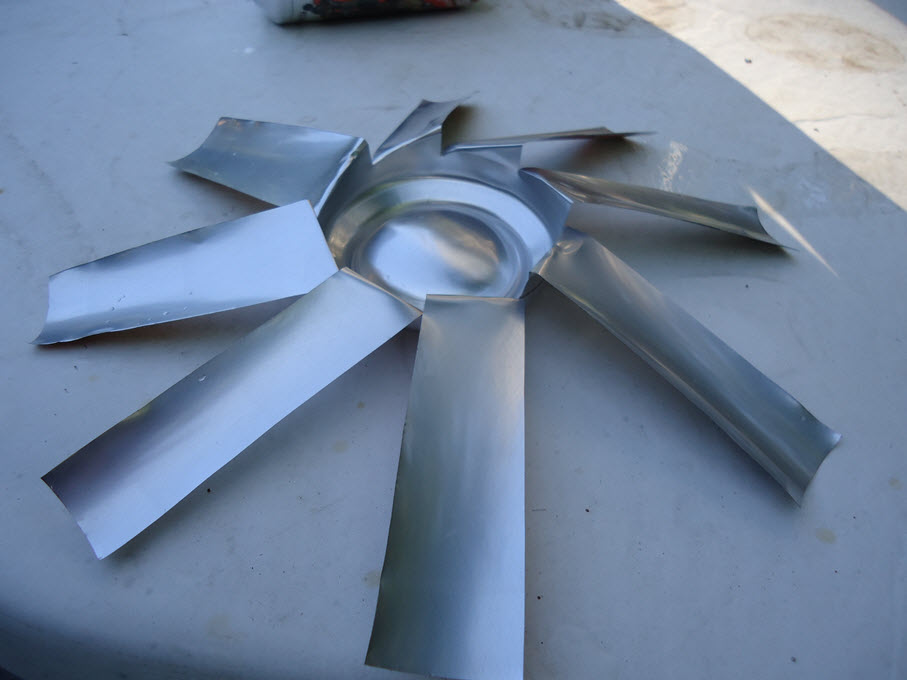
4.    Pull each blades all the way to the bottom, twist and bend it about 30 deg.

soda-can-wind-spinner-step-4a
soda-can-wind-spinner-step-4b

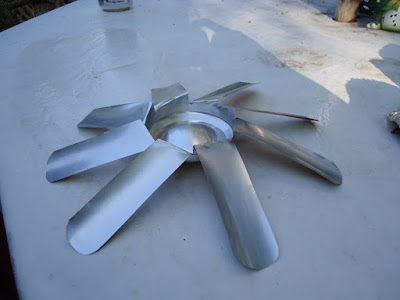
5.    Cut the corners of the blades. Be extra careful, blades are sharp.
soda-can-wind-spinner-step-5

6.    Using the 2nd soda can, cut off the head and leave only about less than an inch from the bottom.

soda-can-wind-spinner-step-6

7.    Insert the base of the 2nd can to the other can.

soda-can-wind-spinner-step-7

8.    Find the center and drill a hole. Make sure that the center hole is big enough to fit the hanger wire. Do not make the center hole too big as it will cause the pinwheel to wobble when it spins. Then drill hole on the end of the blades.

soda-can-wind-spinner-step-8

9.    Put the string around the holes to hold blades in place.
10.   Paint with desired color.
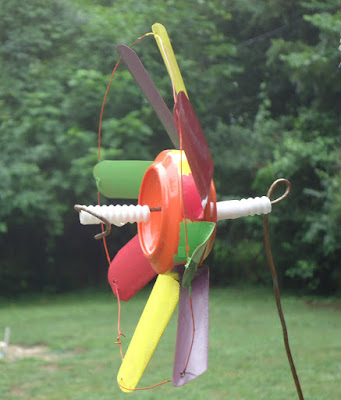
11.   Bend wire hanger and then insert a cut plastic straw followed by the spinner. Insert another plastic straw before locking the wire. Cut straws will serve as stopper.
12.   Place it in your garden and have fun.
soda-can-wind-spinner

soda-can-wind-spinner


Read More »

DIY Terrarium Using an Old Coffee Pot

My friend recently gave me a hen and chick succulent plant. She told me that it is easy to take care either indoor or outdoor. Since it is very small, only a little over 2 inches by diameter, I don’t want it to plant outside as I’m afraid my dog might accidentally step on it. So I decided to plant it indoors and make my own terrarium. Luckily, I have old coffee pot that I can use for my terrarium project.

Terrarium DIY


Materials you need:
  • Coffee pot or any glass jar
  • Succulent plant
  • Sand
  • Potting soil
  • Moss
  • Decoration
Terrarium Materials

DIY Terrarium Using an Old Coffee Pot

  1. Rinse coffee pot or glass jar and sand with fresh water. Let it dry.
  2. Add a layer of sand at the bottom. This will absorb the excess water since the jar has no holes at the bottom.
  3. Add a layer of potting soil. Make sure that the soil layer is deep enough for the plant roots.
  4. Add a thin layer of moss at the top.
  5. Make a hole and add your succulent plants. Make sure that you have enough room for your plants to grow.
  6. Add you decorations. I added my DIY decorations which you can view instructions here.

Coffee Pot Terrarium

Water your plants a little amount at a time using sprayer. My hen and chick succulent does better with a little water. Check your plants water requirements.

Read More »

Hummingbird Feeder DIY Made from Soda Bottle and Seasoning Container

While I was relaxing at our back patio, I saw a hummingbird hovering around my garden. I love watching birds and wanted to attract more in my yard so I made hummingbird feeder from scrap materials available in my storage. It was a successful project and I’m so happy that I only spent few cents to make this hummingbird feeder.

Hummingbird Feeder DIY


Materials you need:
  • Soda bottle
  • Used seasoning container
  • Metal hanger
  • Red flower decoration or other accent of your choice
  • Glue Gun
  • Fliers
  • Drill
  • Sugar and water

Hummingbird Feeder DIY Made From Soda Bottle and Seasoning Container

1.    Give soda bottle and seasoning container a good cleaning. Make sure that seasoning smell and soda smell are completely gone.
2.    Cut off the top most cover of seasoning container, this will leave the cover with hole in it big enough to fit the soda bottle head.


3.    Attach the container cover to soda bottle head using hot glue gun.


4.    While waiting for the glue to dry, drill a hole at the center of bottle cap and 3 holes at the sides of seasoning container. Seasoning container holes should be about 1.5 inches from the bottom. Make sure that the holes are above the bottle cap hole to avoid spillage (see step 9 image). These will serve as humming birds feeding ports.


5.    Add accents to attract hummingbirds. They like red so I used red plastic flowers and attached it around the holes.


6.    Bend hanger wire to make a bottle holder. I added a butterfly made from soda can for an accent.


7.    Fill the bottle with the hummingbird food. I used homemade nectar. To make this, boil 4 cups of water and 1 cup of sugar. Let it cool before filling in the bottle.
8.    Put the bottle cap on as well as the decorated feeding container.
9.    Turn the container upside down. The hummingbird food will flow in the container but will stop when it reaches the bottle cap.


10.    Hang the hummingbird feeder under the tree or near the bush and enjoy watching them. Do not hang this on a sunny area as too much heat will melt the glue.


Read More »

Ladybug Garden Decoration

Every morning before I start working I always look at my garden from the window or sometimes I walk outside and view my flowers closely.  This has been my routine since we set up our backyard garden. One morning I saw a ladybug nesting on one of my plants and thought it would be nice to have a ladybug decoration. So on my next day off from work, I decided to create a ladybug out of the materials we have at home.

Ladybug Garden Decoration
DIY Ladybug Garden Decoration

Ladybug Garden Decoration DIY


Materials needed:
  • Egg shells or any rounded mold you have
  • Acrylic paint and brush
  • Plaster of Paris and water
  • Mixing container and stick

First mixed Plaster of Paris with water. Follow the ratio as per label mixing instructions. I used 2 parts of Plaster of Paris to 1 part of water.


Fill the egg shells with Plaster of Paris mixture. Gently tap it to removed bubbles. Let it dry completely as per drying Plaster of Paris drying instructions.


Slowly remove the egg shells by breaking them and gently peel off little by little. Do it just the way you peel hard boiled eggs.


Apply red acrylic paint and let it dry. You can apply a second coat depending on the quality of your paint.


Paint the ladybug head with black paint, draw a line from top of the head to center top of the back and then add the black spots. Also add the white spots at the head area, this will look like ladybug eyes. Let the paint dry completely before putting it on your garden.

Ladybug Garden Decoration DIY

I put mine in a pot and these ladybugs add charm to my flower pot. This DIY ladybug decoration would also be nice addition to my princess mini-garden. I also posted mushroom garden decoration which you can check here.
Read More »

Mushroom Garden Decoration-Recycled Easter Eggs

We went to egg hunting event last Easter Sunday and my daughter brought home a lot of plastic eggs she collected. I wanted to recycle those Easter eggs into a garden art. This project is so easy and will only need few materials that you probably already have.

Here are the plastic Easter eggs that turned into a mushroom decoration:

Mushroom Easter Eggs


To create that you will need the following materials:
  • Plastic Easter eggs
  • White Paint (or any color you want)
  • Coat Sealant
  • Paint brush
  • Glue gun
  • Tree twigs

Recycling Easter Eggs into Mushroom Garden Decoration

To start with, cut the tree twigs, about 4 inches long which will serve as the mushroom stem.


Then, use glue gun to attach the twigs into the eggs. Now we have a mushroom cap and stem attached together.


Paint the plastic egg with white spots or you can use color of your own choice and then let it dry.  Once dried cover it with coat sealant.


Put it on the garden to have added accent. These mushrooms look beautiful on our potted plant.

Placing it in a very hot location is not a good idea as it will soften the glue so the best place is to put it in a shaded garden.
Read More »

Mushroom Garden Decoration

Recently, my husband bought me a new set of cooking ware which means our old pans should go away since we no longer have space to store them. I hate to throw them away so I decided to re-purpose them as yard decoration. I wanted something whimsical that our little princess will also enjoy and my idea was to turned the pans into a mushroom garden decoration. And ta-da, here's how they look now.

Mushroom Garden Decoration

Recycled Cooking Pans into a Mushroom Garden Decoration

Turning an old pan and tree stump into a whimsical garden decoration adds color and life into our yard. It’s an eye catching garden art that even my princess can’t resist looking at every day. Using the following materials that we already have, I don’t need to spend a lot to upgrade our garden.

Materials:
  • Old cooking pans
  • Tree stump (about 1-2 ft tall)
  • Red and White Spray Paints
  • Masking tape
  • Nail adhesive or screws

How did I do it? It’s easy.
I clean the pans first since they sat outside for almost a month. I gave them a good scrubbing to make sure that oil residues are completely removed. Then I spray painted the pan with white and let it dry. According to paint label, it should be dried in 15 minutes but I waited a little longer then gave a second coat.


Once white paint is dried, I cut out an oval shape into masking tape and stick them into painted pan. I made varying sizes and shape was not perfect oval. Also I did not follow any pattern while sticking them.


Then I spray painted it with red and waited an hour before I gave a second coat. While I was waiting for the first coat to dry, I spray painted the tree stump lightly. It was a very thin coat just to give a nice touch. I let the paint dry overnight.


I slowly peeled the masking tape off and revealed the white dots making it look like a mushroom cap. Then attached it to the tree stump using a nail adhesive. I could have used screws but preferred adhesive because I didn’t want to drill holes in the pans. I put the finished mushroom decorations in our gardens bald spot. It looks great and adds color to our yard. Now I have a whimsical garden for our Princess to enjoy.

Mushroom Garden Decoration


Notes:
It's actually easier to spray red paint first and then do the white details using sponge, but since I only had a white spray paint I did the other way around to make used of paints I currently have.
Read More »

Ice Cream Container Planter

Ice cream for dessert? Yes, we do love ice cream. We always have it in our fridge. Normally we buy a 46 oz ice cream container every time we go grocery shopping and most of the time we get the same brand. One time I had the last scoop and was wondering what I can do with the container since we are regularly getting them. I didn’t have an idea that time so I just collected them and stored in the shed.

Since its spring time, my husband and I started cleaning a little bit. He found those stored container which I neglected for many months. I was debating if I’ll throw them away or re-purpose for something. Before I decided, I looked first on the shelf to see if there’s anything I could use. There’s a left over spray paint and wires that I could use. Just then, I decided to keep them and hit an idea of using these containers in replanting my extra plants. This is how it looks now, a container planter!

Ice Cream Container Planter

Here is what the container looks like before I turned it into a planter.

Ice Cream Containers


Ice Cream Container Planter

First, I started drilling holes in the bottom and 2 little holes at the sides. Holes at the bottom should be big enough to drain water and those at the sides are for hanging the container. Then I spray painted the containers. While waiting for them to dry, I started cutting the wire and form them as S-shape hook. I waited about 24 hours to completely dry.


Once dried, I added the dirt and the plants and then hung them on our fence. Ta-da! Looking good. Can’t wait to see them grow. 

Ice Cream Container Planter

Read More »

Backyard Fire Pit Patio

I enjoy staying outside but fall season is coming up which means we can no longer stay outside a little longer. So to enjoy out in a backyard even when its cold, we built our fire pit. This will keep us warm while we toast hotdogs and marshmallows any time we want to. Other than that it enhanced the look of our backyard too.

How to build a fire pit DIY


Here's what we did.
1. We measured how big we want to make our fire pit patio area by poking stick with a rope at middle then stretched out the rope while marking it around with stakes. Spray paint it using our left over spray paint to mark the circled area.

2. Spay weed remover to dry out the grass. Wait for few days until grass are dried and then remove old grass sod.


3. We watered down the soil and tamper it to level the surface. Then we put black plastic edging and laid down landscaper cloth. Then fill it in with play sand. Mist it and then pack down firmly.


 4. Time to lay down stones. Since we did not plan on interlocking them, we used chandler prism stone which we think has a better look in circular patio.

5. Spread rocks evenly on the spaces around stones.

6. Finally done, our very own backyard fire pit.

DIY Firepit

Since we are getting close to fall, I will start planting next year. It's already looking great and relaxing. We used it in the last 2 weeks after getting it done. Grilling hotdogs and marshmallows became our weekend activity. Good thing we have stock of wood for the fire pit. Can't wait for spring to start planting, surely this will be my new sanctuary.


Read More »

Random Posts