Halloween Craft – Spider Made From Snack Cup

I have been busy last summer doing a lot of stuff here and there. The weather was so nice and had to take advantage on it. It was fun. We did a lot of outdoor activities and visited several places. I really did not have that much time in between work and family to write and share those wonderful time we had.

And now summer is almost over, time to get back my craft tools out from the box. To start with, me and my little girl started making Halloween craft from used snack cups.

DIY Spider


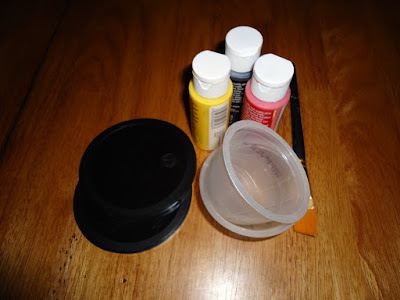
Materials:

  • Used snack cups (apple sauce, fruit cups etc.)
  • Used plastic soda lid (black)
  • Acrylic Paint/Brush
  • Scissors
  • Wiggly eyes

DIY spider materials

How to make spider from used snack cups:


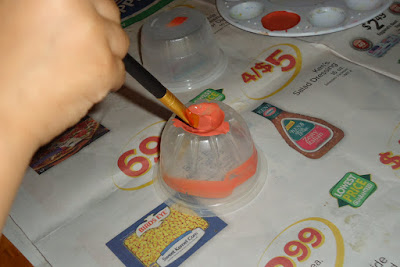
1. Paint the cup according to your design. I painted mine orange and coated twice.

Cups Painting

2. While waiting for the paint to dry, cut the lid into pieces about 1cm wide.

Spider legs

3. Mark the position of the spider legs at the side of the cup and cut slits big enough to fit the legs. 4 slits at the left side and 4 slits at the right side.

DIY Spider legs

4. Insert the cut plastic lids into the slits  and bend to form spider legs.

DIY Spider

5. Add wiggly eyes and you’re done.

DIY Spider


Read More »

Soda Can Wind Spinner

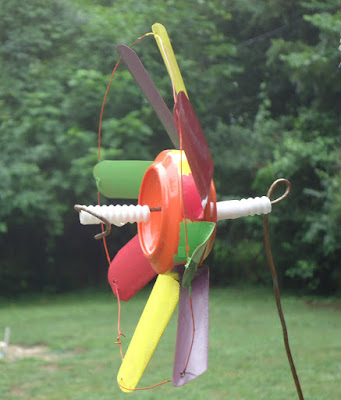
We went to a botanical garden and saw a very nice wind sculpture which captured my daughter’s attention. It was very mesmerizing and thought of making our mini wind spinner. This is a cheap garden decoration project you would love. Note that this project is not kid friendly, though they can enjoy watching the wind spinner once it’s done and already in the yard spinning.
  Soda Can Wind Spinner

Materials needed to to do this:
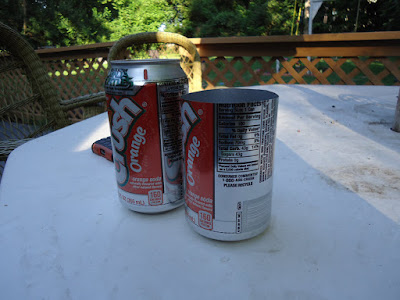
  • 2 empty soda cans
  • Scissors
  • Wire/Fishing line
  • Plastic Straws or any stopper
  • Old hanger
  • Fliers
  • Safety Hand gloves
  • Paint

How to make Pinwheel made from soda can

1.    Clean the soda can and let it dry. Using a pair of scissors, cut off the top part of the can, about 1 inch from the rim. Be careful when doing this as the can edge is very sharp that could cut your finger.

soda-can-wind-spinner-step-1

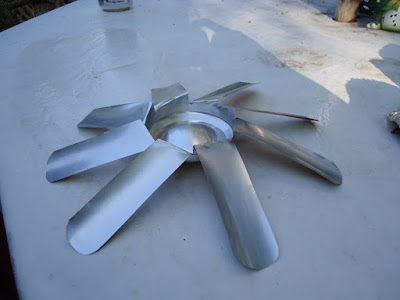
2.    Make 8 equal blades from the side of the soda can. Do this by vertically cutting one side of the can from top to about ½ inch at the bottom. Cut the same at exactly opposite side of the soda can.

soda-can-wind-spinner-step-2

3.    Now that you have 2 equal sides, vertically cut one side of the soda can and then cut the other side to make 4 equal sides. Repeat until you have 8 blades.

soda-can-wind-spinner-step-3a
soda-can-wind-spinner-step-3b

4.    Pull each blades all the way to the bottom, twist and bend it about 30 deg.

soda-can-wind-spinner-step-4a
soda-can-wind-spinner-step-4b

5.    Cut the corners of the blades. Be extra careful, blades are sharp.

soda-can-wind-spinner-step-5

6.    Using the 2nd soda can, cut off the head and leave only about less than an inch from the bottom.

soda-can-wind-spinner-step-6

7.    Insert the base of the 2nd can to the other can.

soda-can-wind-spinner-step-7

8.    Find the center and drill a hole. Make sure that the center hole is big enough to fit the hanger wire. Do not make the center hole too big as it will cause the pinwheel to wobble when it spins. Then drill hole on the end of the blades.

soda-can-wind-spinner-step-8

9.    Put the string around the holes to hold blades in place.
10.   Paint with desired color.
11.   Bend wire hanger and then insert a cut plastic straw followed by the spinner. Insert another plastic straw before locking the wire. Cut straws will serve as stopper.
12.   Place it in your garden and have fun.

soda-can-wind-spinner

soda-can-wind-spinner


Read More »

DIY Terrarium Using an Old Coffee Pot

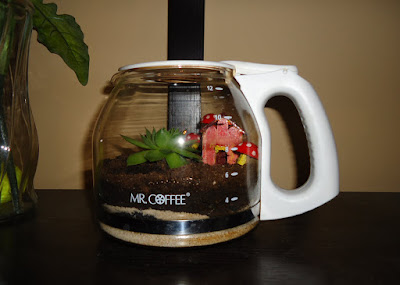
My friend recently gave me a hen and chick succulent plant. She told me that it is easy to take care either indoor or outdoor. Since it is very small, only a little over 2 inches by diameter, I don’t want it to plant outside as I’m afraid my dog might accidentally step on it. So I decided to plant it indoors and make my own terrarium. Luckily, I have old coffee pot that I can use for my terrarium project.

Terrarium DIY


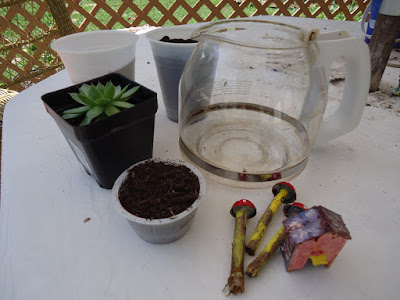
Materials you need:
  • Coffee pot or any glass jar
  • Succulent plant
  • Sand
  • Potting soil
  • Moss
  • Decoration
Terrarium Materials

DIY Terrarium Using an Old Coffee Pot

  1. Rinse coffee pot or glass jar and sand with fresh water. Let it dry.
  2. Add a layer of sand at the bottom. This will absorb the excess water since the jar has no holes at the bottom.
  3. Add a layer of potting soil. Make sure that the soil layer is deep enough for the plant roots.
  4. Add a thin layer of moss at the top.
  5. Make a hole and add your succulent plants. Make sure that you have enough room for your plants to grow.
  6. Add you decorations. I added my DIY decorations which you can view instructions here.

Coffee Pot Terrarium

Water your plants a little amount at a time using sprayer. My hen and chick succulent does better with a little water. Check your plants water requirements.

Read More »

Salt Dough Ref Magnets DIY

Making salt dough ref magnets project is a fun way to spend your time with kids. Get them busy and let them play around with their creative minds. Just set up a little work place making sure that work area, tables and floors are cover to avoid unwanted paint spills.

Here is the end product of our project. I painted the carrot, watermelon and baseball while my daughter painted the rest.

Salt Dough Ref Magnets

Materials needed to do this:
•    1 cup flour
•    3/4 cup salt
•    6 tbsp water
•    Acrylic paint
•    Brush
•    Magnets

Salt dough ref magnets how to:


1. Mix flour, salt and water.
2. Knead until all are mixed and form a ball of dough. Add more water if needed.
3. Mold the dough into your kids’ favorite shapes. Get them involve at molding their favorite shapes. You can use any tools you have at home to create shape. I used my daughter’s memory blocks, spoons and bread knife in sculpting our shapes. Just be creative.


4. Place a magnet at the bottom and put it in a baking pan. It’s recommended to have baking sheet so it would be easier to remove once it’s dried. Salt dough is a little heavy so you might want to use stronger magnets for big sculptures.


5. Dry it out under the sun or bake for 2 hours at 200F. It might be longer depending on your dough thickness. Check after 1 hour, if still moist continue baking for another hour. I let mine dried under the sun.


6. Let it cool if oven dried before start painting. Check for loosen magnets, apply glue gun if needed.
7. Enjoy and have fun painting with your kids.


Read More »

Kids Canvas Painting

Last weekend I went out with friends at painting studio. I would definitely say that I had fun. At first I was skeptical that I'm not going to make it, but when the artist started showing how it’s done, I feel relieved. Canvas painting is so easy that anybody can do it even younger ones, as young as my daughter. So I thought about introducing canvas painting to her since she likes playing around with water color. This is a great activity for kids to encourage them and enhance their artistic skills. We both enjoyed the activity and I was surprised with how it turned out. You can’t tell it was painted by a 2 year old kid.

Kids Canvas Painting
Canvas Painting for Fathers Day

Materials you need:
  • Canvas
  • Acrylic paint
  • Brush
  • Paint Tray Palette
  • Masking tape
  • Water

Kids Canvas painting

1. Apply a thin white paint on canvass and let it dry.
2. While waiting to dry, prepare your tape. I wanted to use smaller width but I only have 1 inch tape so I cut them to get 1/4 inch width by laying it into flat surface and cut it using ruler and sharp cutter. This is optional, width of the tape depends on your preference.


3. Place the tape on your canvas. There’s no pattern to follow. Make sure that you stick them good to avoid paints getting underneath.


4. Pour a small amount of paint in a tray palette. I only bought 5 colors but I managed to produce more colors by combining them using the blending ratio I found in food color box.


5. Let the kid play around with colors. Paint the canvas until all covered.


6. Let it dry overnight.


7. Peel off the tape and hang on the wall.

Kids Artwork
My Toddler Masterpiece

As you see, some paint got underneath the tape. Too much paint was probably applied and maybe watered down too since my daughter was dipping the brush to the water too often. I’m tempted to retouch it but I won’t since it’s her first canvass paint done.
Read More »

Pork Ham Recipe - Pork Estofado Style

I was craving for pork estofado but I don’t have the main ingredients available in our fridge.  Estofado is made from pork leg (my moms recipe) with banana plantain in it. These main ingredients are not available from local stores near our home so I went to Asian Store to buy pata (pork leg). Unfortunately pork leg was not available either so I grabbed the pork ham instead since I was informed that pork ham and pork leg are from the same part of the animal. My experimental recipe turned out good... umm yummy as what my daughter said.

Pork Ham Estofado

Ingredients:
  • 2 lbs sliced pork ham (fat included)
  • 1/2 cup soy sauce
  • 1/4 cup vinegar
  • 1 12oz-can cherry Dr. Pepper soda
  • 2 garlic gloves
  • 1/2 tsp pepper
  • 1 cup water
  • 2 pcs dried bay leaves
  • 6 eggs
  • 2 tsp vegetable oil


How to make pork ham estofado - experimental version


1. On a separate pot, boil eggs for 12 minutes and set aside when done.
2. Heat frying pan on a medium heat and add vegetable oil.
3. Saute garlic until it turns brown. Add sliced pork ham and fry for about 5 minutes.
4. Pour soy sauce, water and Dr. Pepper soda.
5. Add bay leaves and ground pepper then bring to boil.
6. Set to low heat and cook for 1 hour.
7. Add the vinegar and cook for additional 10 minutes.
8. Peel the hard-boiled eggs and add to cooked pork ham.
9. Serve and enjoy.
Read More »

Hummingbird Feeder DIY Made from Soda Bottle and Seasoning Container

While I was relaxing at our back patio, I saw a hummingbird hovering around my garden. I love watching birds and wanted to attract more in my yard so I made hummingbird feeder from scrap materials available in my storage. It was a successful project and I’m so happy that I only spent few cents to make this hummingbird feeder.

Hummingbird Feeder DIY


Materials you need:
  • Soda bottle
  • Used seasoning container
  • Metal hanger
  • Red flower decoration or other accent of your choice
  • Glue Gun
  • Fliers
  • Drill
  • Sugar and water

Hummingbird Feeder DIY Made From Soda Bottle and Seasoning Container

1.    Give soda bottle and seasoning container a good cleaning. Make sure that seasoning smell and soda smell are completely gone.
2.    Cut off the top most cover of seasoning container, this will leave the cover with hole in it big enough to fit the soda bottle head.


3.    Attach the container cover to soda bottle head using hot glue gun.


4.    While waiting for the glue to dry, drill a hole at the center of bottle cap and 3 holes at the sides of seasoning container. Seasoning container holes should be about 1.5 inches from the bottom. Make sure that the holes are above the bottle cap hole to avoid spillage (see step 9 image). These will serve as humming birds feeding ports.


5.    Add accents to attract hummingbirds. They like red so I used red plastic flowers and attached it around the holes.


6.    Bend hanger wire to make a bottle holder. I added a butterfly made from soda can for an accent.


7.    Fill the bottle with the hummingbird food. I used homemade nectar. To make this, boil 4 cups of water and 1 cup of sugar. Let it cool before filling in the bottle.
8.    Put the bottle cap on as well as the decorated feeding container.
9.    Turn the container upside down. The hummingbird food will flow in the container but will stop when it reaches the bottle cap.


10.    Hang the hummingbird feeder under the tree or near the bush and enjoy watching them. Do not hang this on a sunny area as too much heat will melt the glue.


Read More »

Random Posts